Waterfowl Photography Tips: Using Waterfowl Behavior to Capture Better Photos
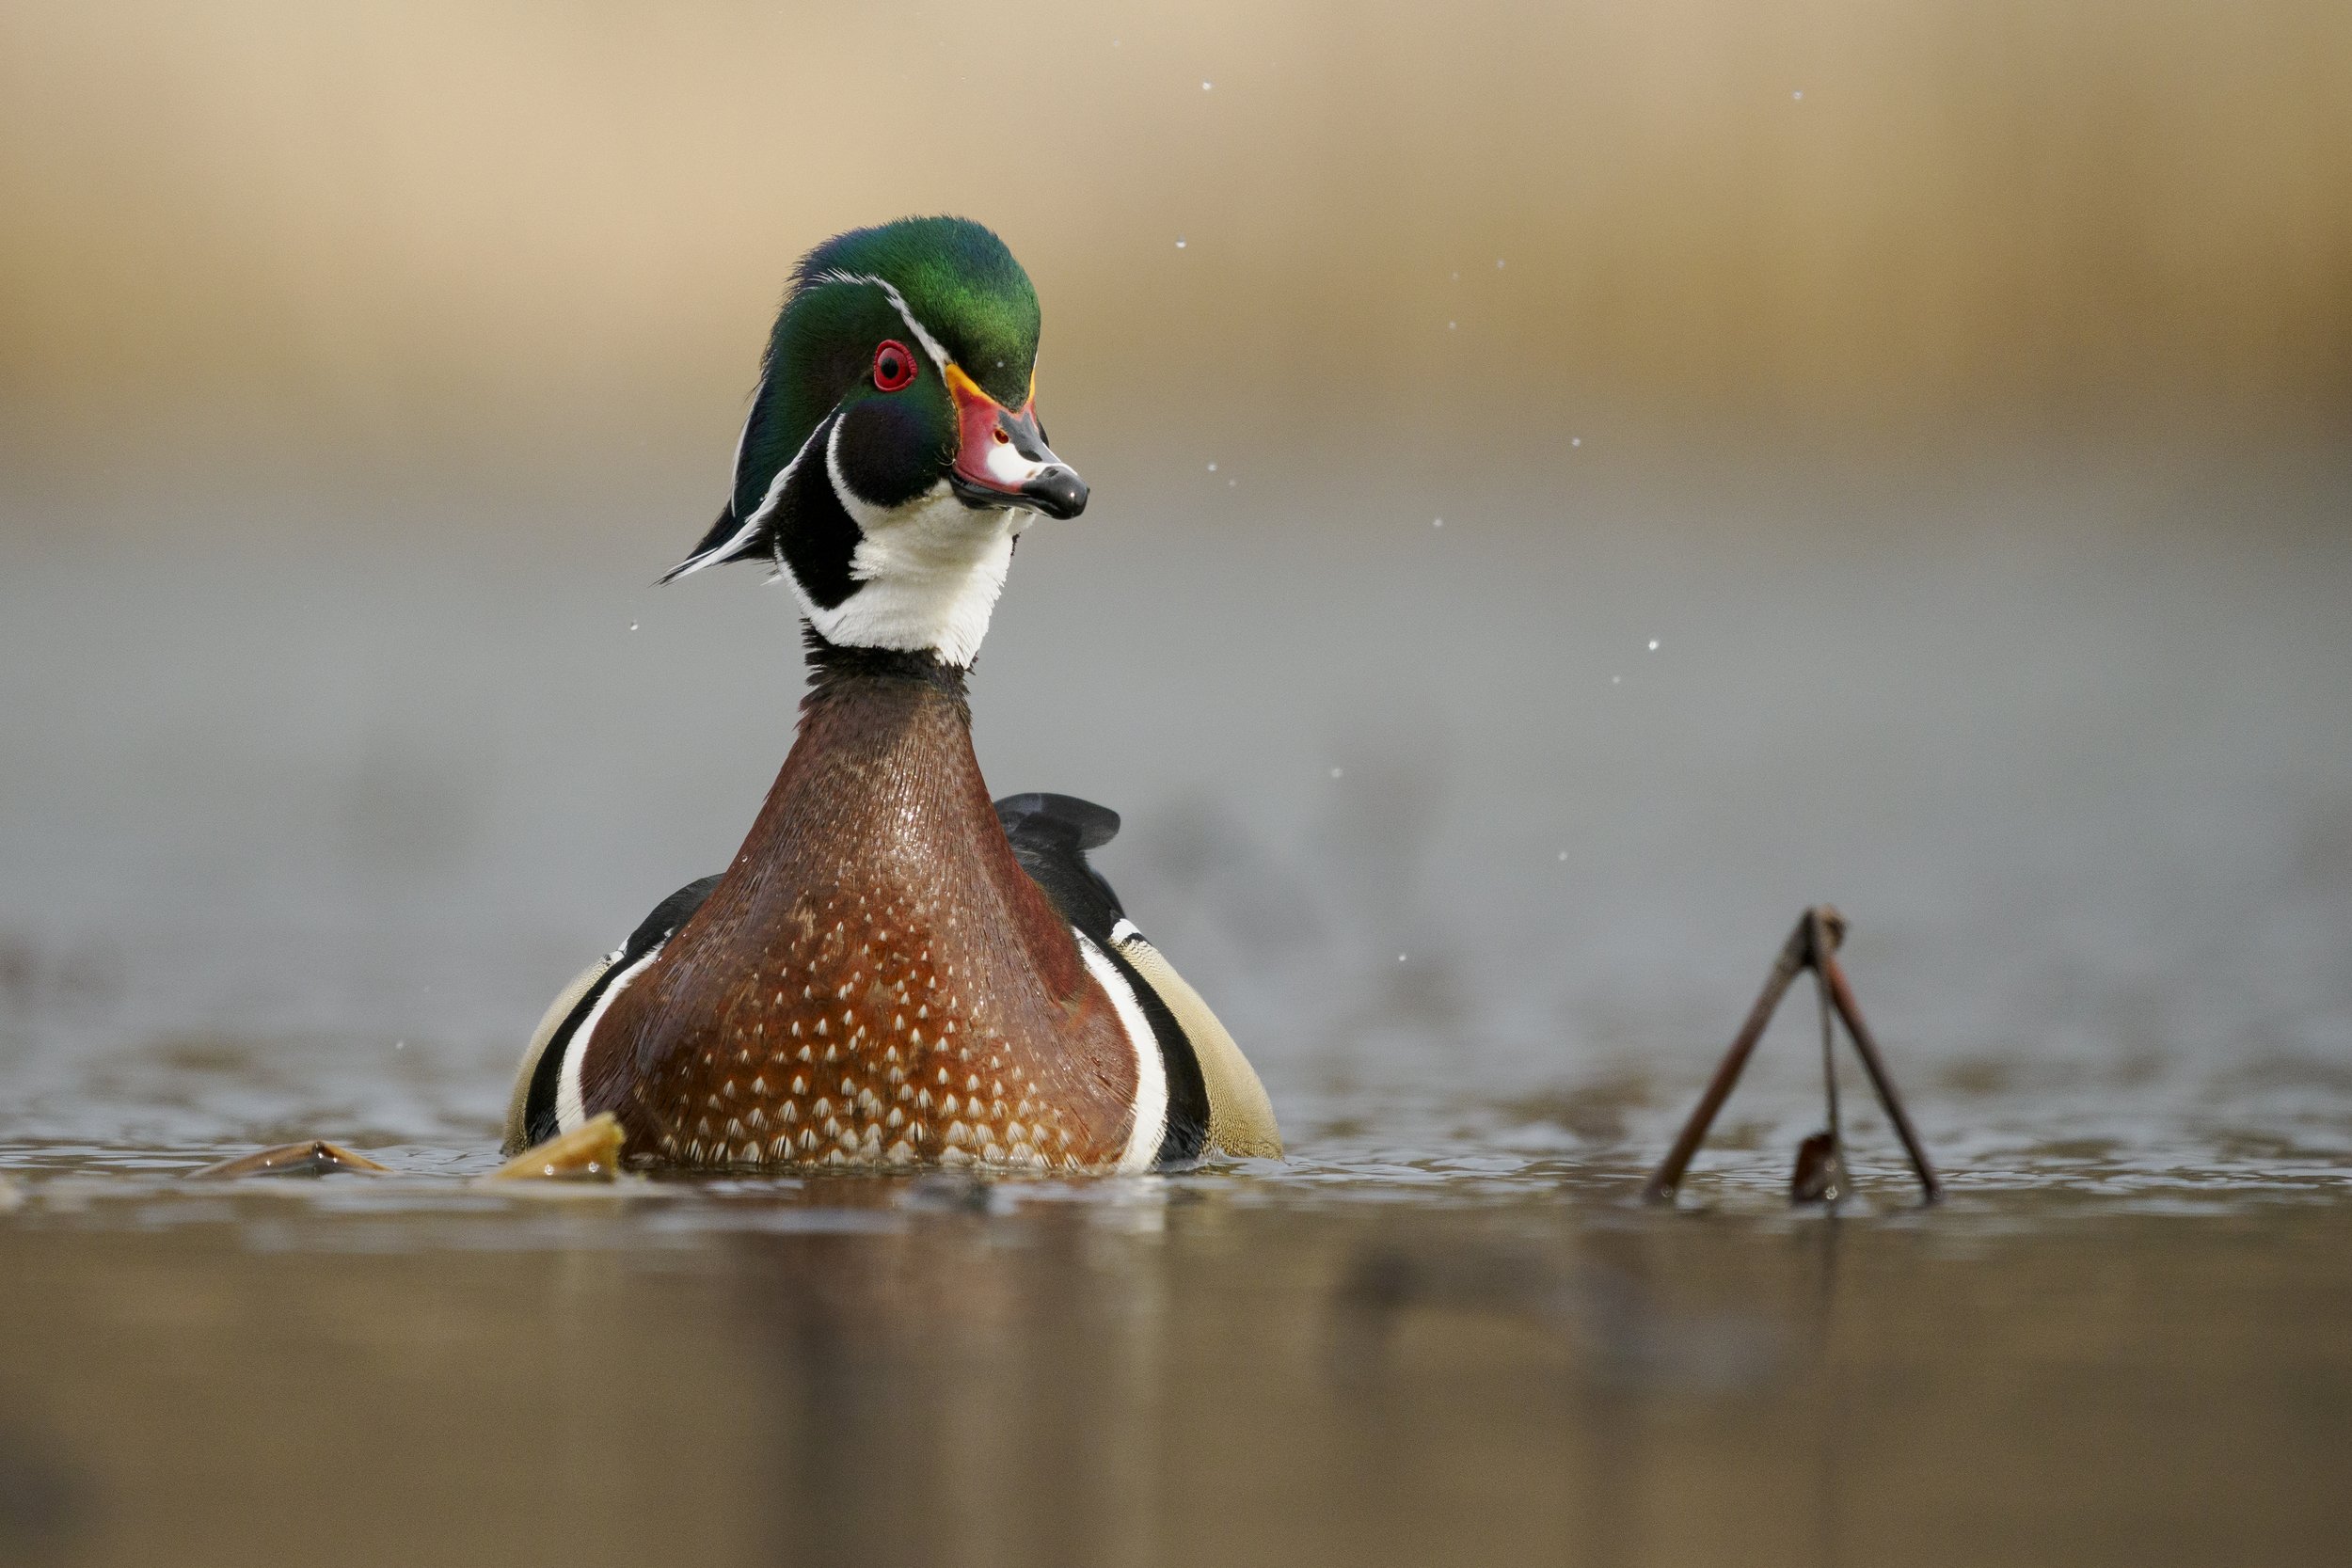
Wood Duck Shaking off after foraging.
OM-1 Mark II 500mm f/5.6 1/2500 ISO 1000
Last month, we covered how to get set up for waterfowl photography—scouting locations, approaching a scene, and dialing in your camera and lens placement.
This month, we’re taking the next step: using behavior cues to anticipate action so you’re ready before the moment happens.
Quick Takeaways for Waterfowl Photography
If you’re short on time, here are a few key tips that can make a big difference:
Watch behavior first—great shots come from anticipation, not reaction
Start around 1/640–1/1000 for calm birds on the water
Increase to 1/1600+ when you see action coming
Learn the preening sequence to predict wing-flapping moments
Pick one bird and commit—don’t bounce between subjects
Position yourself with the wind at your back for better angles
Look for subtle takeoff cues like neck stretching and vocalizing
Adjust your settings as behavior changes—not after
Exposure Settings and Behavior Cues
When photographing waterfowl, paying attention to behavior is what separates average images from great ones. Many species share similar “tells” that signal when something is about to happen—and if you recognize them early, you can adjust your settings in time.
Most of the time, ducks are sitting calmly on the water. In these moments, you can use a relatively slow shutter speed and still get sharp images—especially helpful in early morning or late evening light when pushing ISO becomes an issue.
A good starting point is 1/640 to 1/1000. This will freeze subtle movement while keeping your ISO under control. If there’s wind causing the birds to bob or ruffle their feathers, you may need to increase your shutter speed slightly.
The key is this: when the behavior changes, your settings need to change with it.
The Preening Sequence (And Why It Matters)
Ducks are predictable in one very useful way—they often show you exactly what they’re about to do.
A great example is preening behavior.
Many species follow a similar sequence:
Preening feathers with their bill
Spinning or shifting position on the water
Repeated dunking to clean themselves
Finishing with an energetic wing flap
That final wing flap is where the magic happens.
By this point, the bird is soaked, and when it flaps its wings, water droplets explode off its body. If you have a darker background or a bit of backlight, those droplets can really stand out and create a dynamic image.
Once you recognize this sequence starting, you can prepare:
Increase your shutter speed (1/1600 or higher)
Lock focus on the bird
Get ready for the final moment
One important note: when one bird starts preening, others often follow. It’s tempting to jump between subjects, but that usually leads to missed shots.
Pick one bird. Stay with it. Be ready.
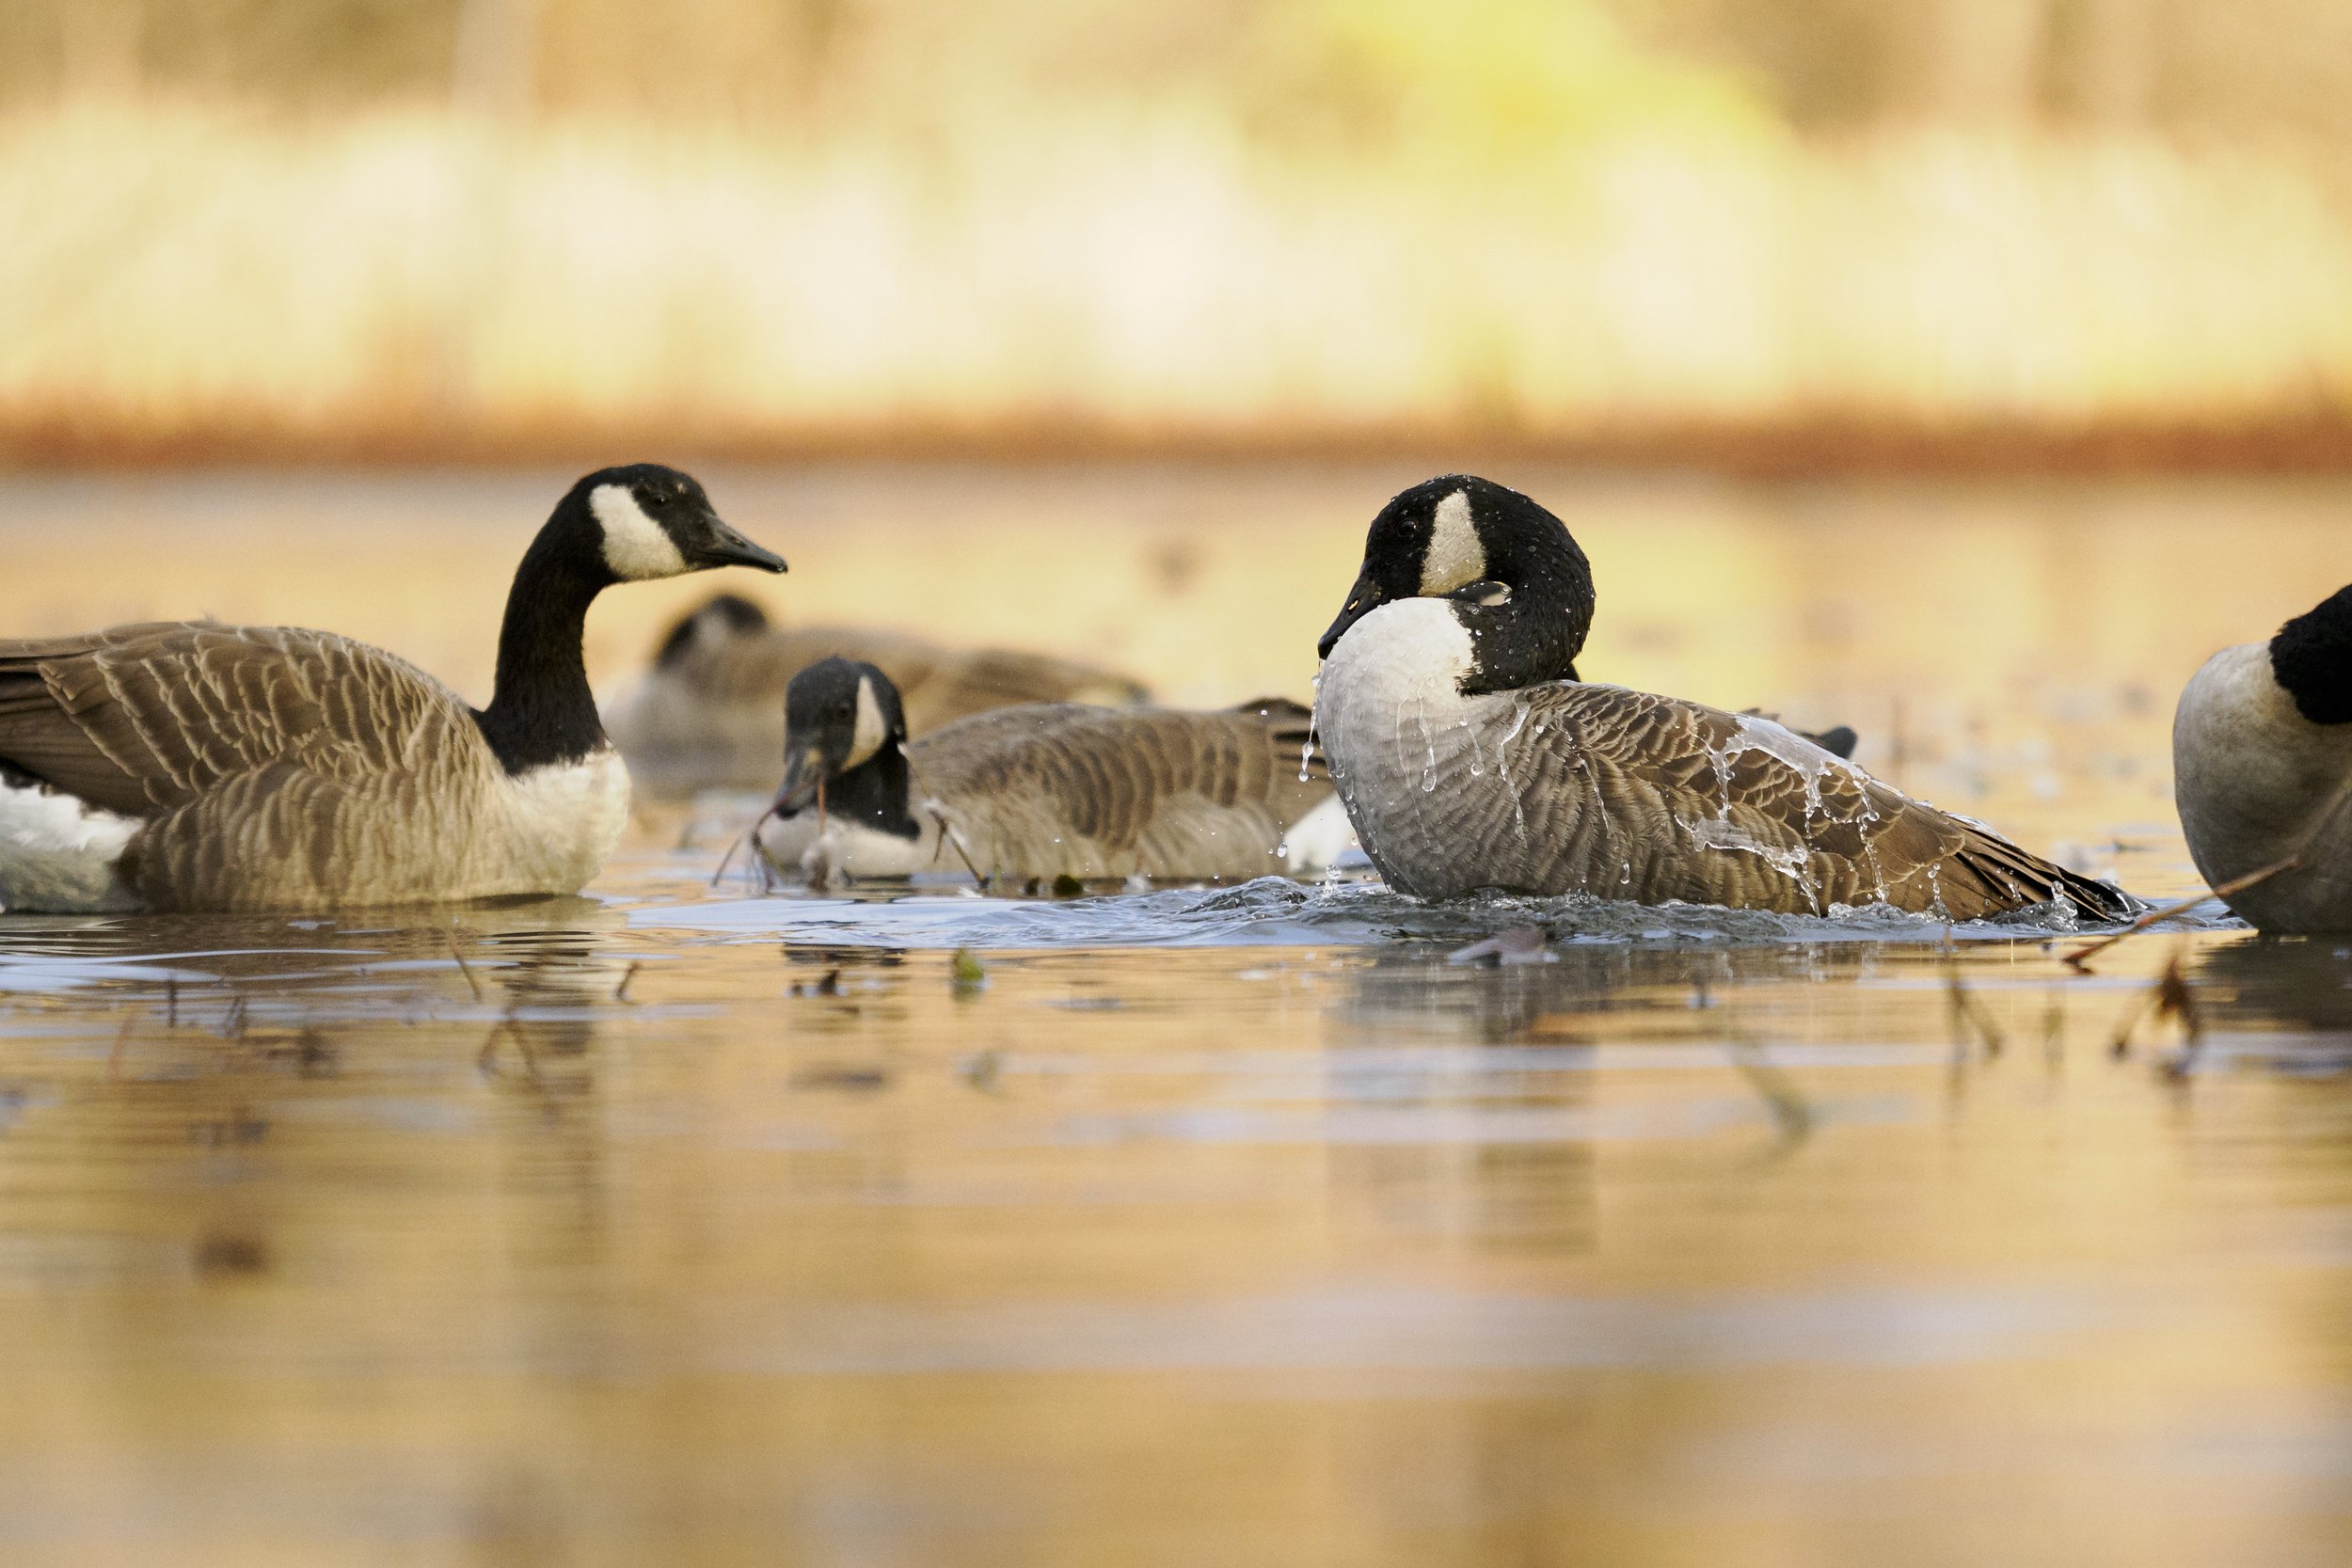
Canada Goose in the middle of dunking and rising out of the water. This bird flapped her wings off about 2 minutes after this photo was taken.
OM-1 Mark II 200mm f/2.8 1/2000 ISO 2000
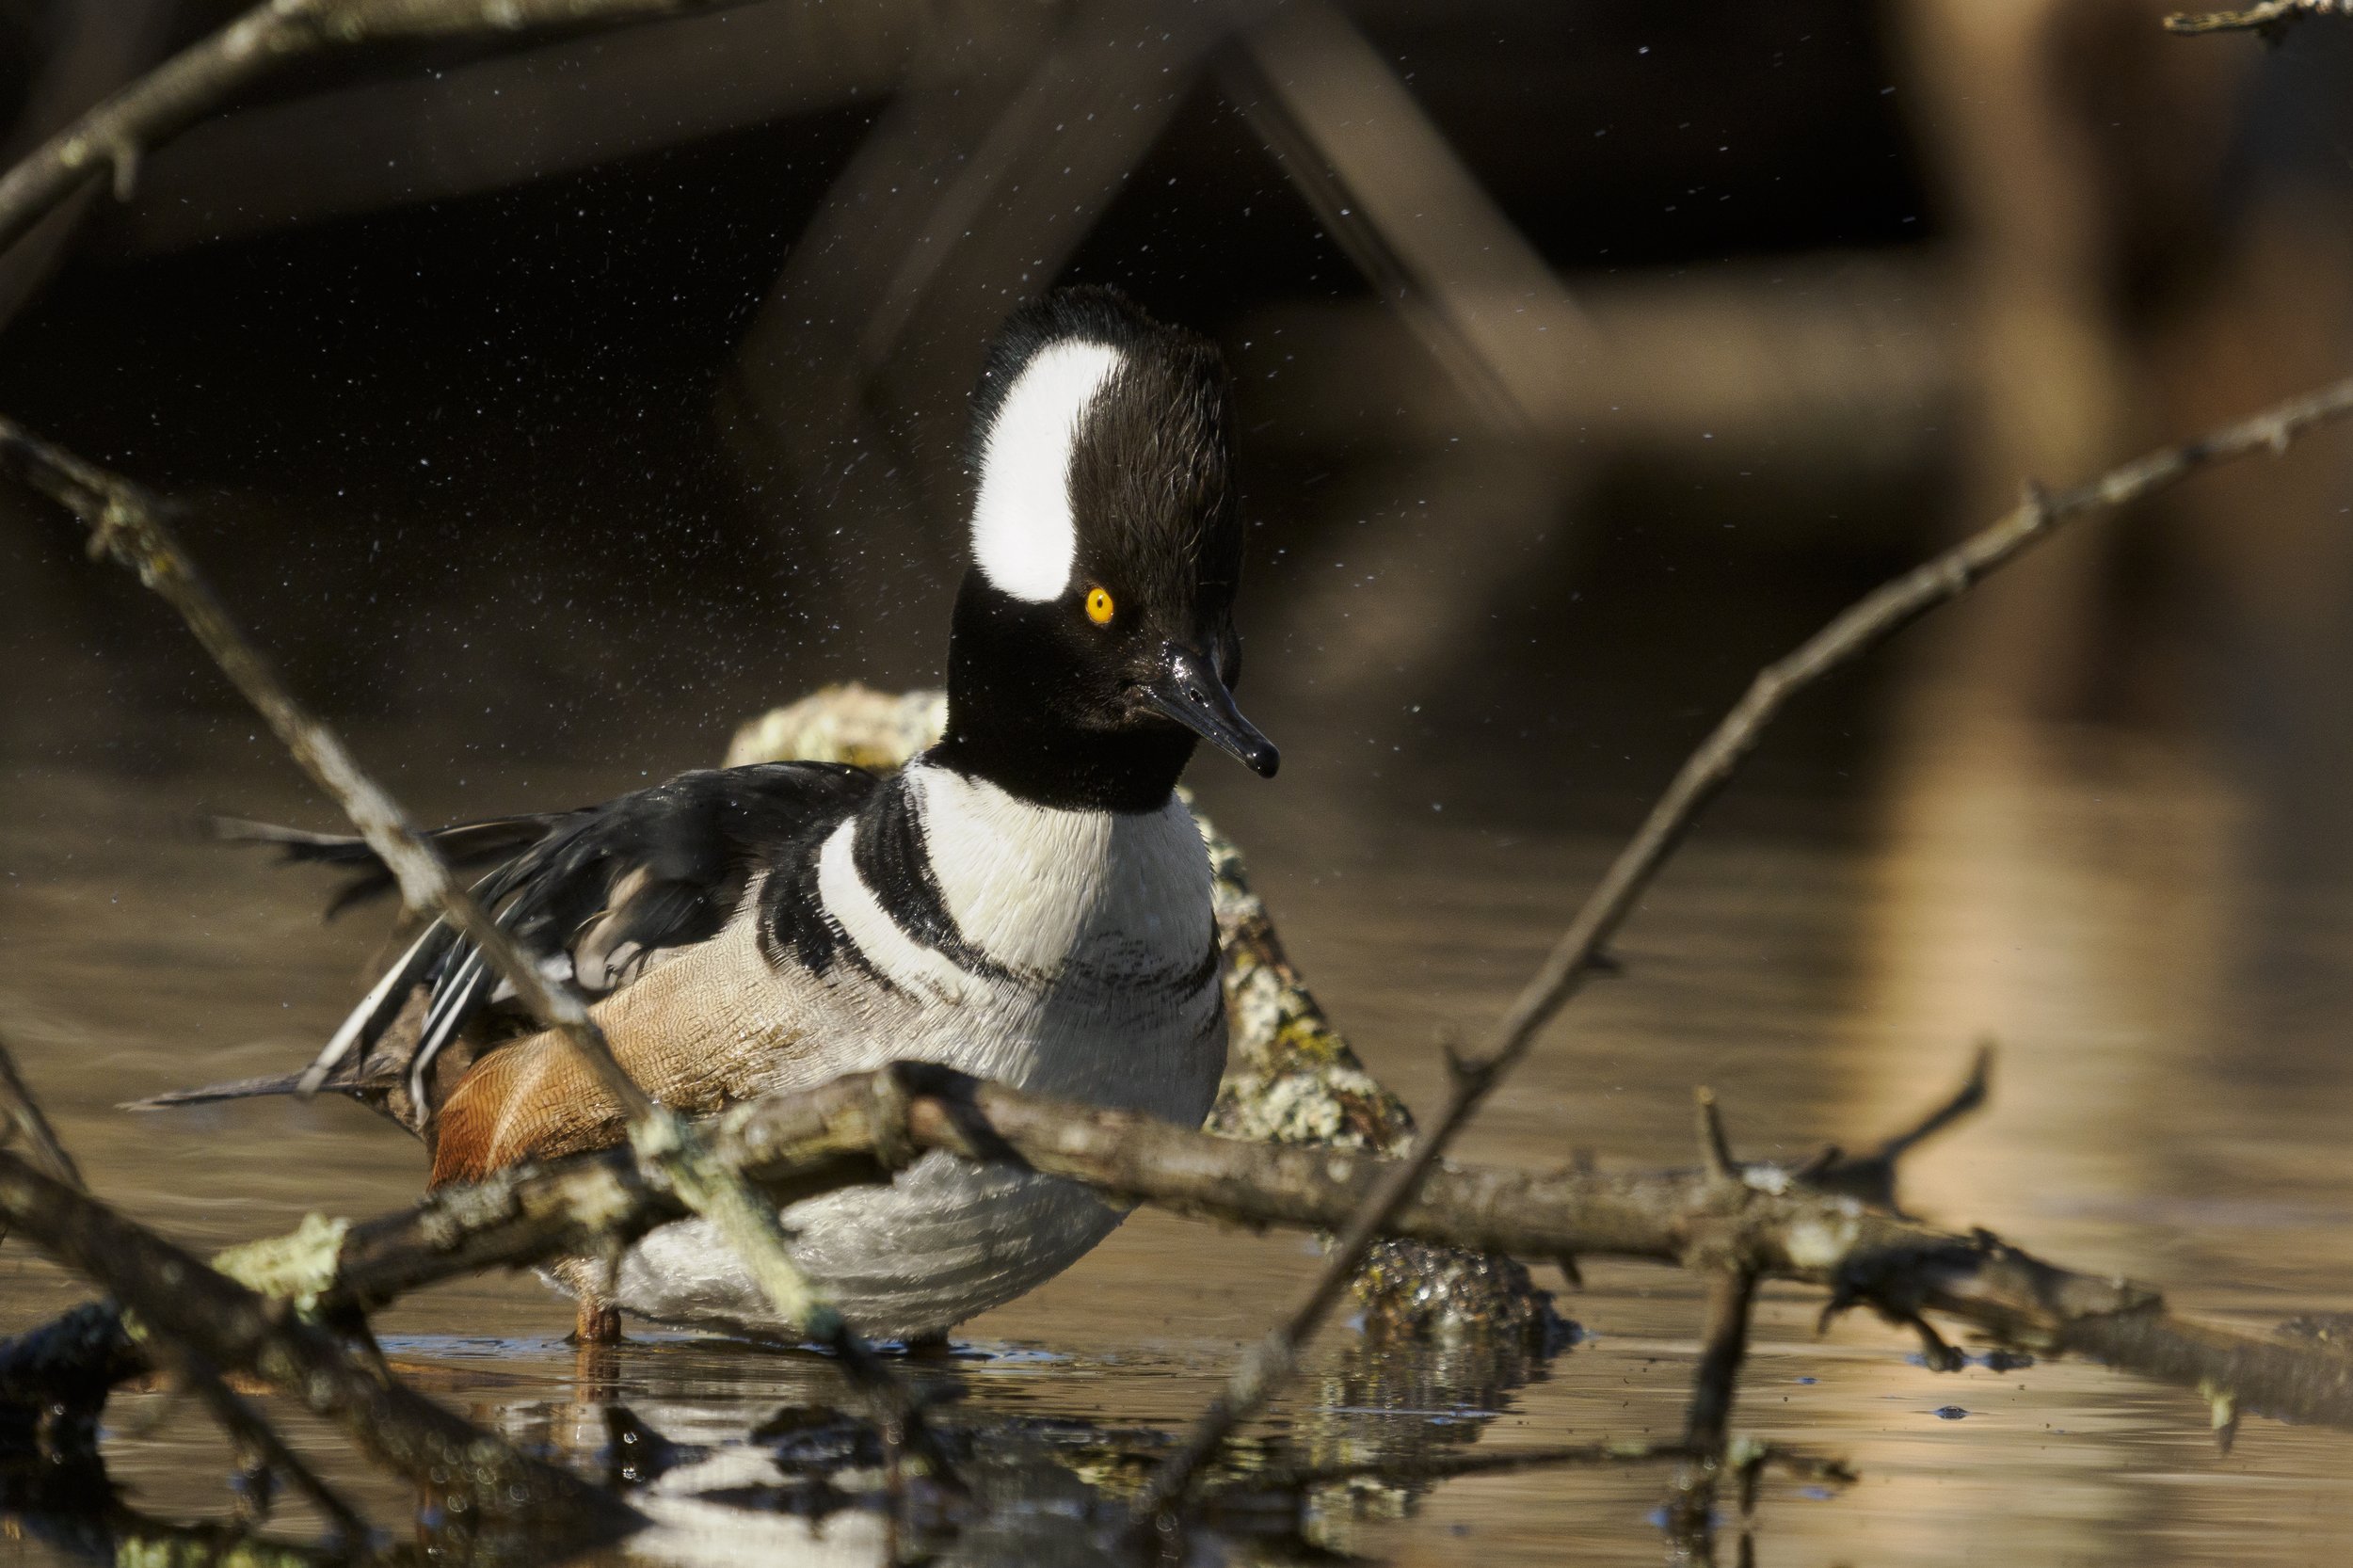
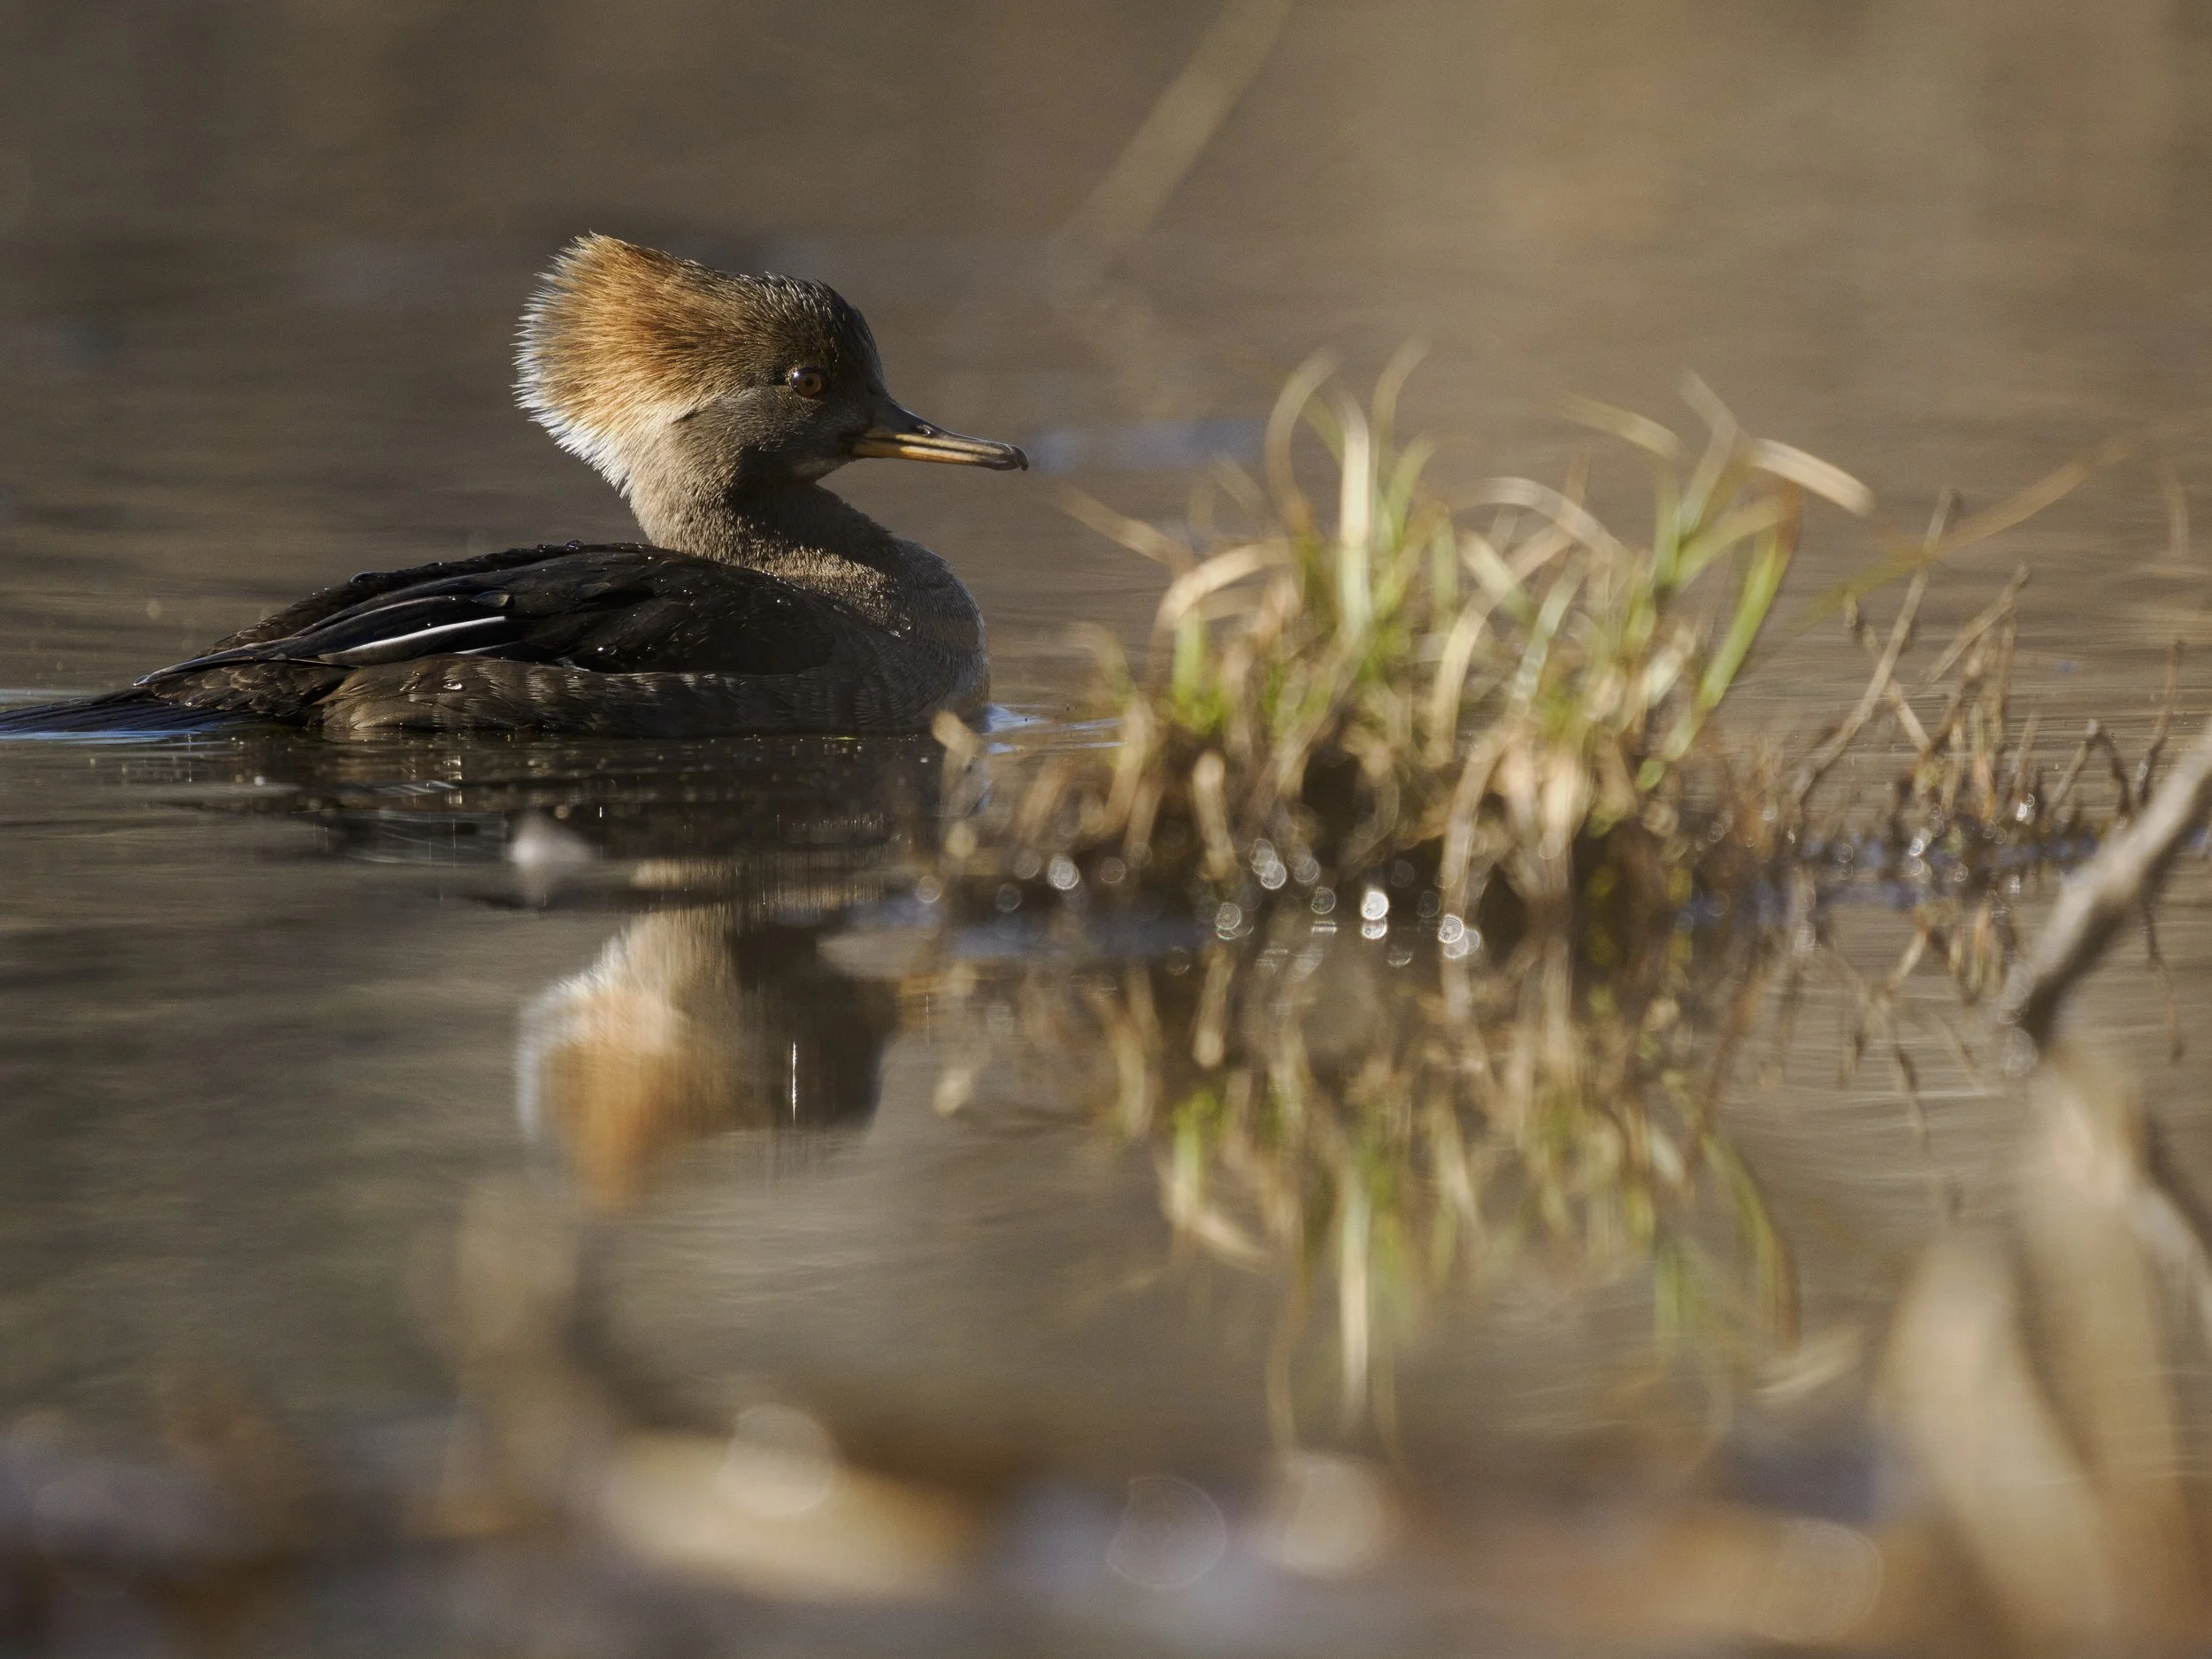
Hooded Merganser in the midst of shaking off. The dark background allows the water droplets to be visible.
OM-1 Mark II 500mm f/5.6 1/1250 ISO 800
Using Wind to Your Advantage
Wind direction is one of the most overlooked factors in waterfowl photography.
Birds almost always face into the wind. It helps them stay streamlined and insulated, and it makes takeoff and landing easier.
If you set up with the wind at your back, you’ll:
Photograph birds facing you instead of away
Have a better chance at capturing takeoffs and landings head-on
Just like aircraft, birds take off and land into the wind to generate lift. Position yourself correctly, and you’ll naturally improve your angles without doing anything else.
Recognizing Takeoff Cues
Takeoffs happen fast—but not always without warning.
While it varies by species, there are a couple of common signals:
The bird stretches or elongates its neck
Increased vocalization among nearby birds
It often looks like they’re “checking in” before they go.
If you notice these signs, it’s your cue to prepare:
Bump your shutter speed up
Get locked in on your subject
Be ready for sudden movement
That said, if the birds are spooked by people, all bets are off. In those situations, takeoffs can be instant and unpredictable.
Matching Settings to Behavior
Your settings should follow what the birds are doing.
Calm water, minimal movement → 1/640 to 1/1000
Preening or wing flapping → 1/1600 or higher
Takeoff and flight → as fast as needed based on species
Once you’ve captured sharp images at higher shutter speeds, don’t be afraid to bring it back down when things settle. This helps keep your ISO in check.
Understanding Movement by Species
Not all ducks move the same way.
Some, like mallards, can launch almost instantly off the water with just a few wingbeats. Others need a running start, skimming across the surface before lifting off.
The more familiar you are with your subject, the better you’ll be at predicting how fast things will happen—and how fast your shutter speed needs to be.
A Note on Shutter Speed and Wing Motion
There’s a common assumption that you always need very fast shutter speeds to freeze wing movement—but that’s not entirely true.
At full extension, a bird’s wings actually slow down momentarily. This means you can often capture sharp wing positions even around 1/640, especially in lower light.
It’s a useful trick when you’re trying to balance sharpness with ISO.
FIELD NOTE:
As a specific example that ties all these concepts together. One morning while out along the marsh, I set myself up to photograph a raft of ring-necked ducks that were foraging. After waiting, the ducks eventually moved closer to my position and the ducks started their preening sequence. Dunking their heads, straightening their wing feathers with their bills, and scratching with their feet.
I noticed this and focused in on one male in particular that was closest to me. The male was facing away from me but was positioned in a way that if he flapped his wings, I would get a nice mirror image and even display of his wings outstretched.
I prefocused on the males head, increased my shutter speed, and made sure I was in a burst mode with a high frame rate, and waited. Soon after a few more dunks, the duck lifted up out of the water to flap his wings.
By positioning myself low along the water, I was able to isolate the bird away from the background and capture the motion of the wings. Using a high burst rate allowed for a large number of frames to be taken during the sequence so I could choose the image where the wings looked the best.
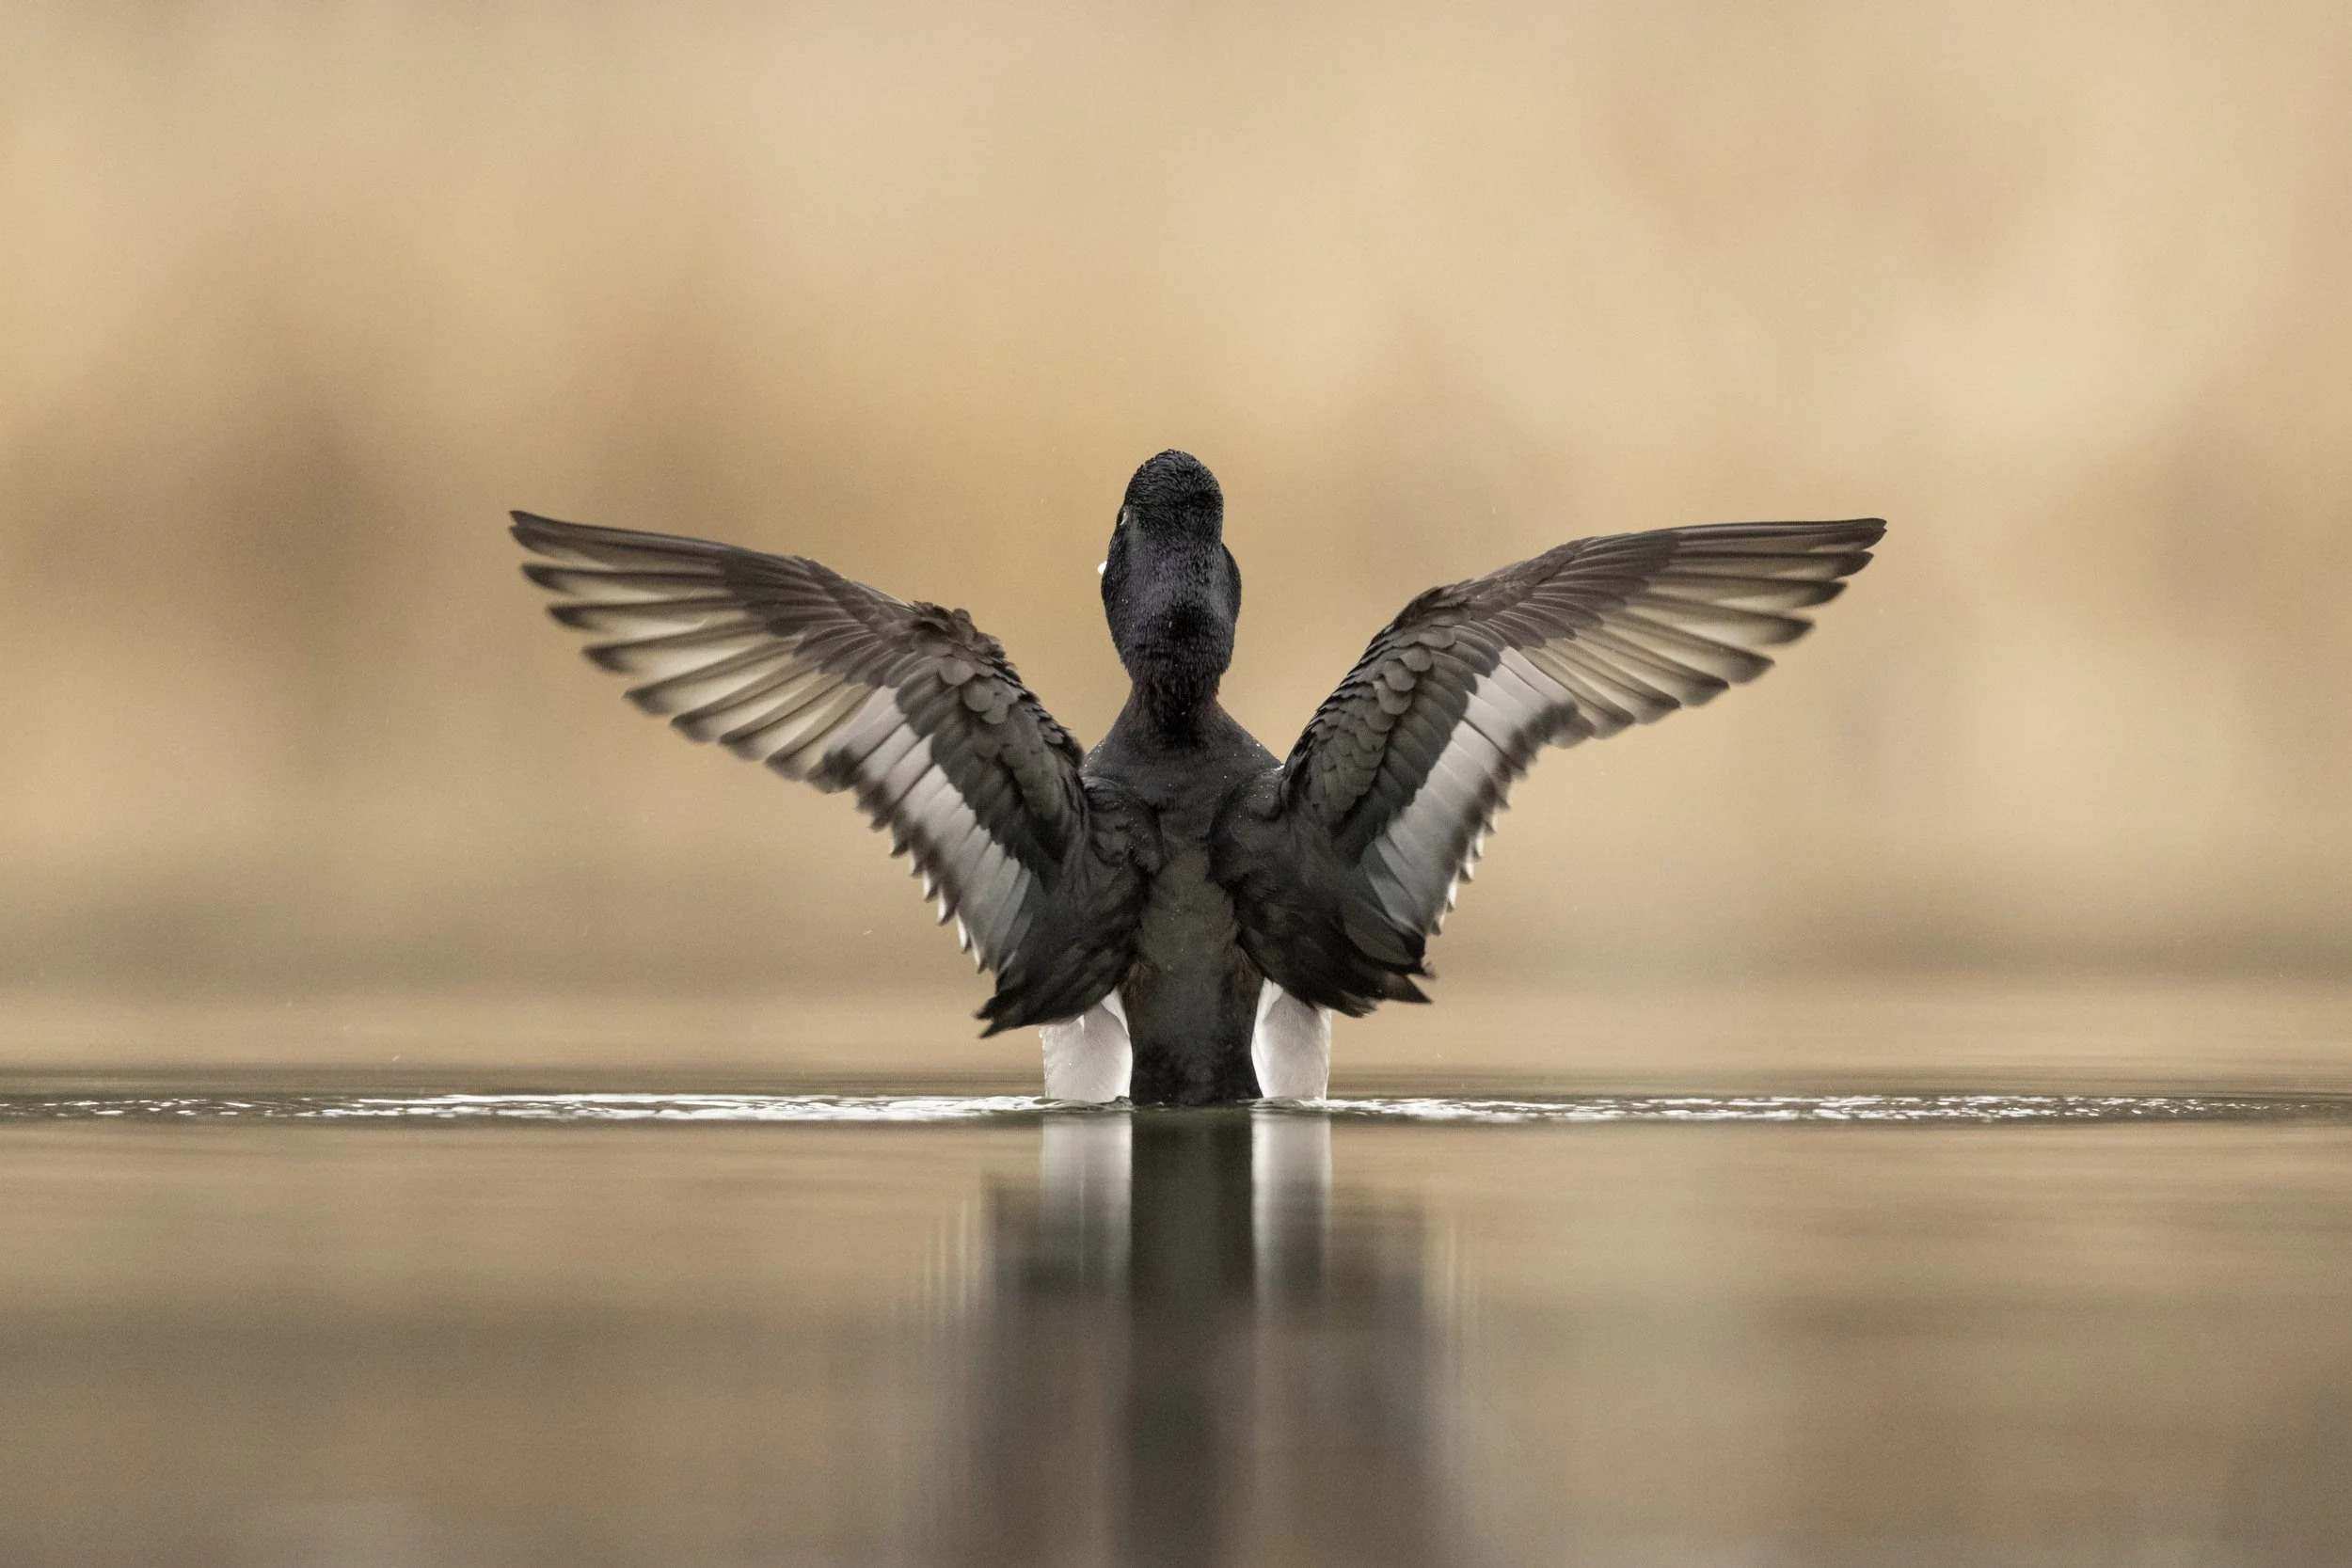
Ring-necked Duck flapping off after preening sequence.
Nikon Z9 840mm f/5.6 1/640 ISO 4000

Looking Ahead
In the next post, we’ll dive into autofocus settings and how to make it easier to consistently get sharp images of waterfowl in motion.
If you’re looking to improve your wildlife photography or get more out of your OM System gear, I also offer one-on-one wildlife photography mentorship sessions where we can go deeper into topics like field technique, autofocus setup, and wildlife behavior.