
Best Autofocus Settings for Waterfowl Photography with the OM-1 Mark II
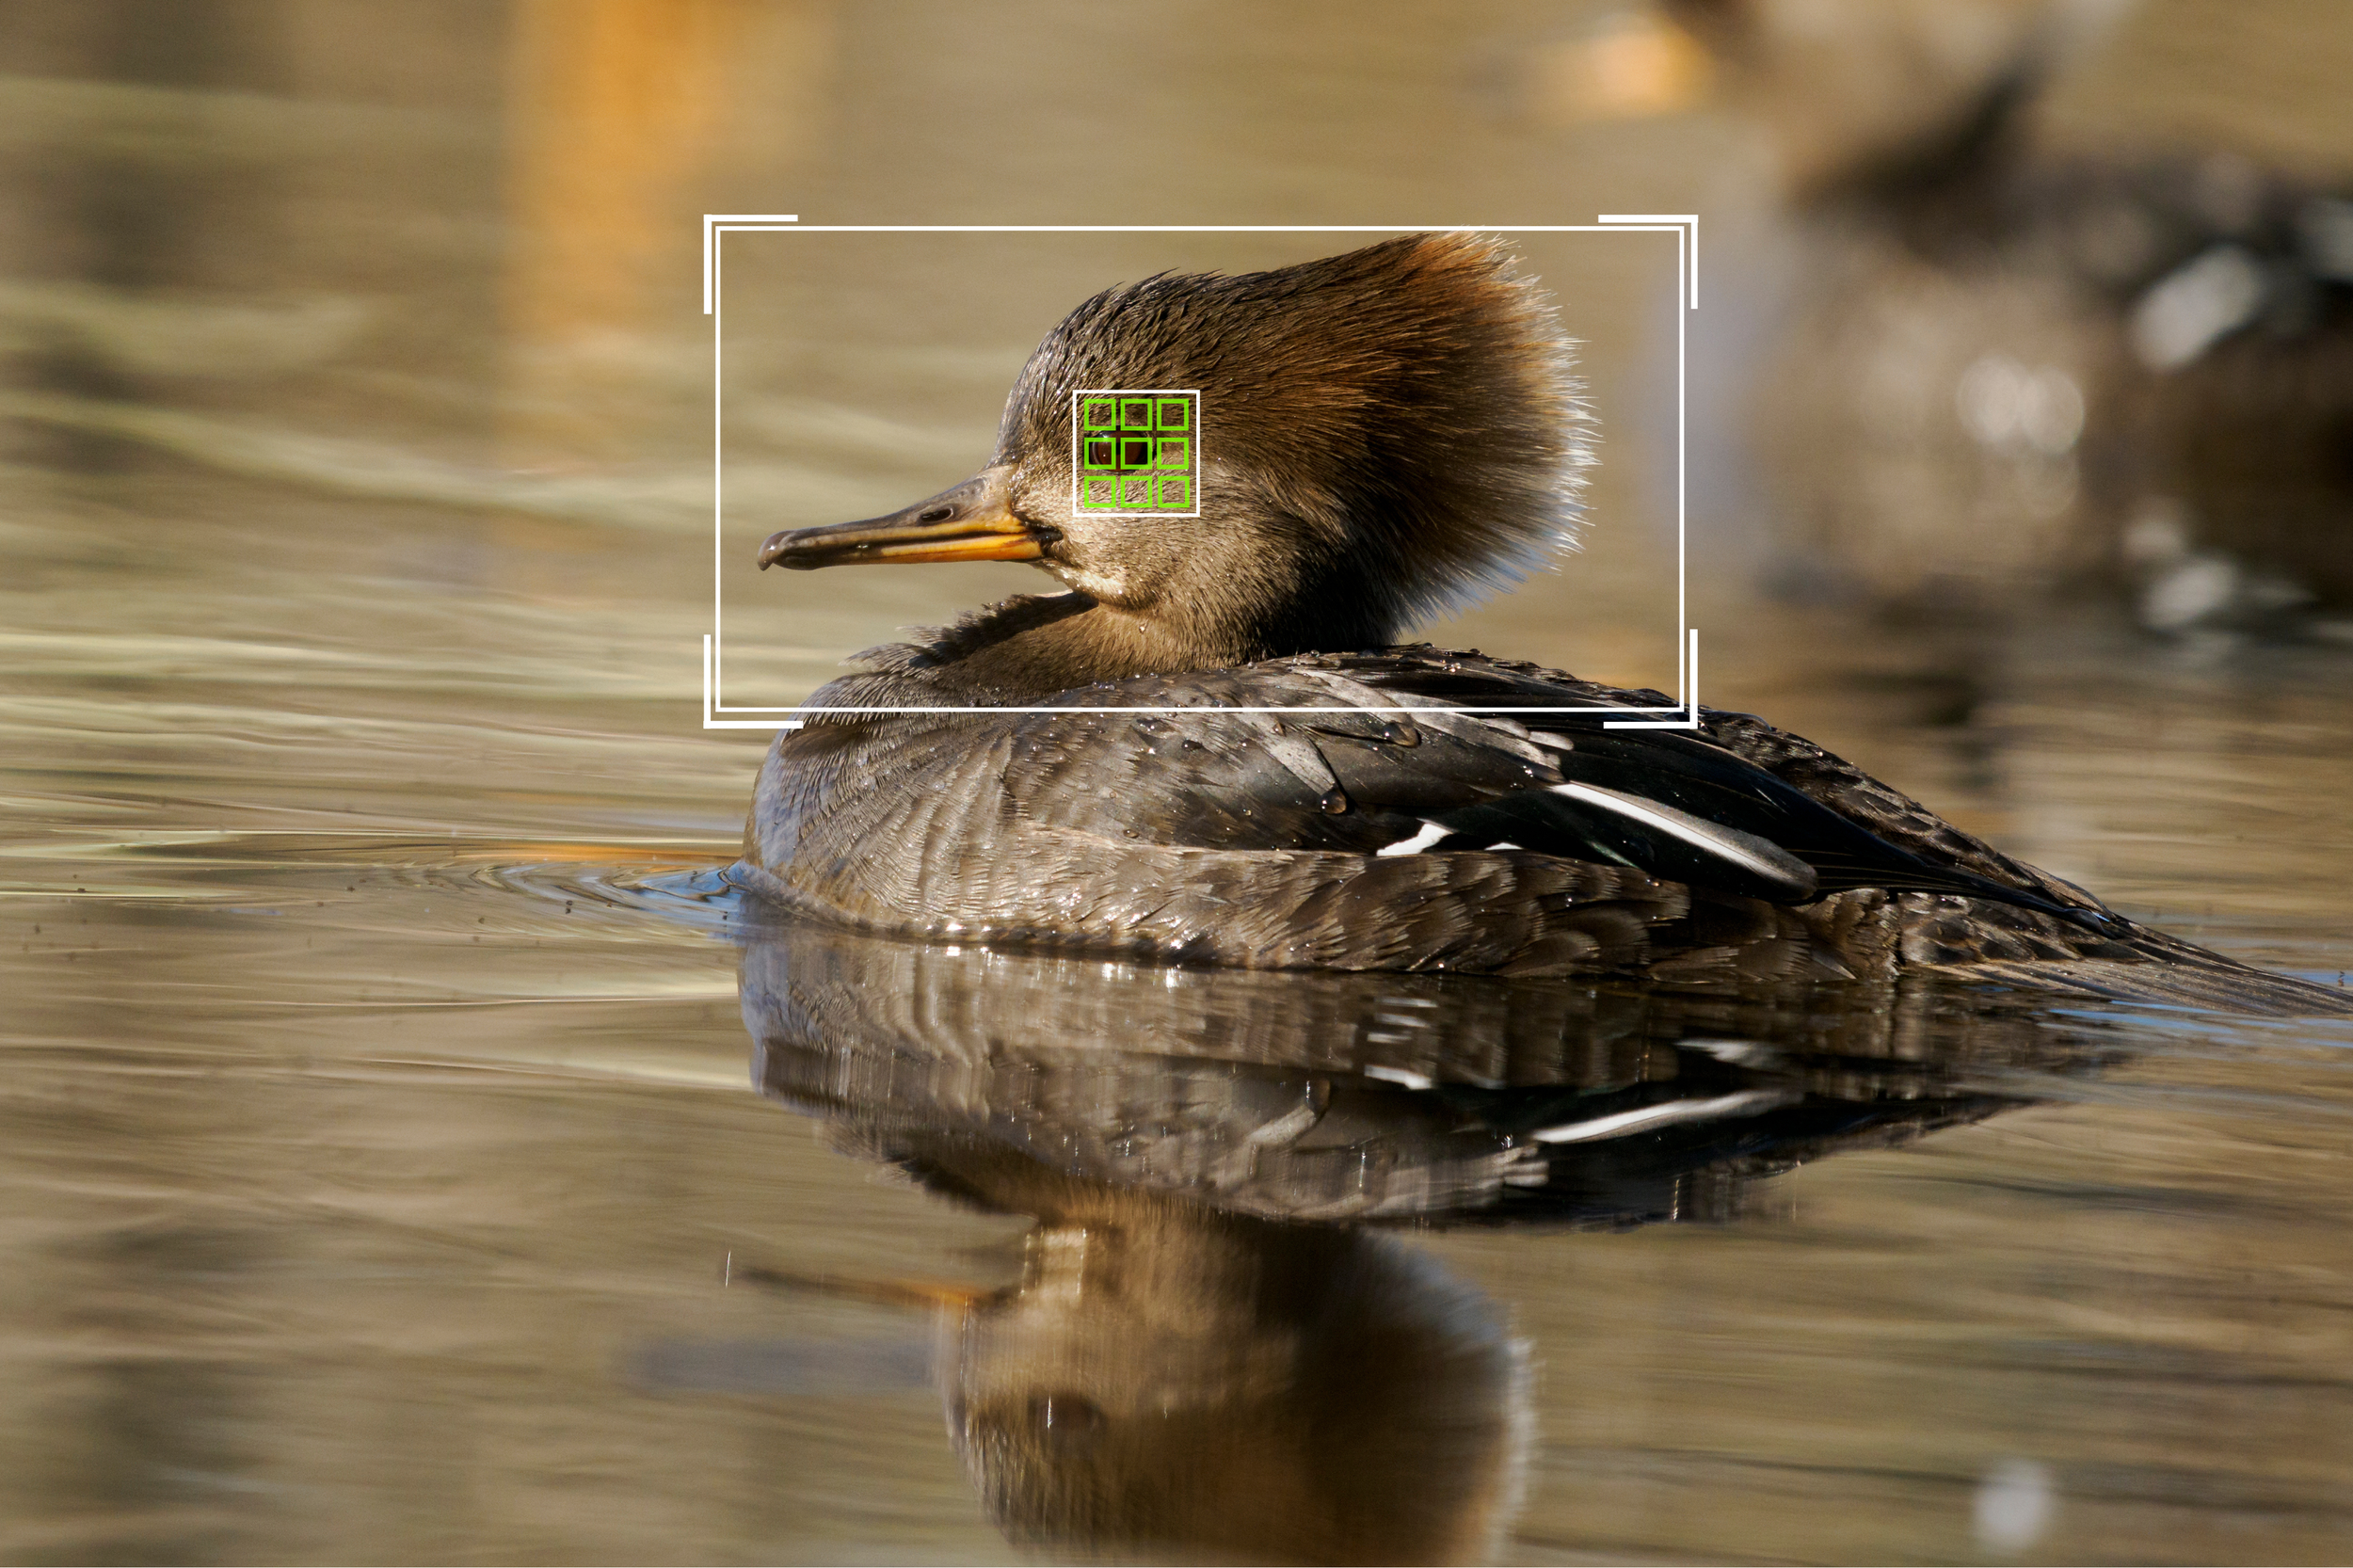
Hooded Merganser paddling by close to shore.
Om-1 Mark II 500mm f/5.6 1/1250 ISO 800
This duck was very close to me so I was able to use a large target area with tracking. Te subject detection picked up the head and eye of the bird ensuring accurate focusing.
We have covered how to set yourself up for waterfowl photography, how to recognize and interpret behavior to help you get the most out of your encounters.
This month we will be discussing specific autofocus settings and techniques that I use when photographing these birds along the water.
Quick Takeaways
If you’re short on time, here are a few key tips that can make a big difference:
Customize your camera buttons to help make it easier in the field
Adjust target area size to match the subject you are photographing
Adjust AF sensitivity based on subject behavior and location
Toggle tracking ON/OFF depending on situation
Camera Customization to make Autofocus Easier
Autofocus adjustments are one of the most common things I am doing in the field and in the moment when a subject is in front of me. This is why the majority of the customizable buttons on the OM-1 Mark II are programmed to adjust AF in some way or another.
I have the front bottom function button programmed to allow me to adjust between different target modes by cycling through with the rear dial. I like this placement because it allows me to adjust the mode while still keeping my pointer finger free to operate the shutter.
Next I have the AEL button programmed to toggle between turning subject tracking off and on. I really like this because there are times when tracking can actually slow you down in the field, we will get to that in a minute.
Other buttons that I have customized are the ISO button programmed to magnify the viewfinder to confirm focus, the record button to toggle on and off focus peaking, and the exposure compensation button to engage subject locking.
Autofocus settings and Target Area Customization
When photographing wildlife I am always in C-AF mode. This allows the camera to adjust focus as the animal is moving. Even with a stationary subject, C-AF works perfectly, especially when tied to back-button AF, which offers the ability to have Single AF and C-AF when the button is pressed and held.
One setting that is often forgotten about is the AF sensitivity setting. This can be adjusted from a range of -2 to +2 and it impacts how sensitive your camera is to adjusting focus when something new enters the AF target area.
With a sensitivity of -2, the camera will react slower, and prioritize what was previously focused on even when something new enters the frame. This is useful if a subject moves behind vegetation momentarily, the camera will keep focus on the subject rather than immediately jumping to the new object.
A sensitivity of +2 means the AF is more sensitive to any new object entering the target area. This is helpful with small birds that are moving erratically and you need your camera to react quickly to any change in position.
Ducks are often slower at their movement especially along the surface of the water so I typically have my sensitivity setting to 0 or +1. I find that this setting works well as it is a balance between reacting quickly while still not being too jumpy.
There are many times where there is vegetation poking out from the surface of the water, and this can easily cause the camera's AF to jump around. If you notice your AF is reacting too quickly, try adjusting this sensitivity and see if that helps.
To adjust this setting:
Go to the AF menu
Scroll to the 4th page
Select C-AF sensitivity
Adjust the level of sensitivity
Customizing your Target Areas
Using the appropriate target area for your subject, can really make a difference in getting consistent proper focus and missing the critical moment.
I like to use the custom target areas because they allow me to adjust based on what I am photographing.
For C1 I create a single AF box size. This allows me to pinpoint focus on a specific part. Useful for distant subjects where I want to ensure focus is not being distracted, and also useful on close subjects where I want to ensure focus is on the head or eye of the subject.
For C2 I create a target area slightly larger, a 3 by 3 box. This works really well for the majority of situations.
For C3 I set the box size to a larger rectangle. This is important for waterfowl photography, as these birds are often floating along the surface of the water. By creating a wider rectangular box, I now do not need to pinpoint focus on the bird. Instead my target area covers a large portion of the surface of the water, and the camera can then very easily track the bird.
For C4 I set a larger still box, but still not the whole area. This is useful for when a duck is taking off and I want a larger area for the camera to look to maintain focus.
The main things to consider here is, do not set your target area and forget to adjust it as the situation changes. Use the target area that will get you consistent results.
Mental Checklist in the Field:
I typically start with C2 with tracking engaged. This works for the majority of subjects and works for both distant and close subjects.
If I notice focus is missing or tracking is not being consistent, then I will switch to C1 mode to help pinpoint focus more precisely.
If tracking is still inconsistent, I will toggle it off.
If there is a large open area, or If I am photographing diving ducks that surface unexpectedly, I will switch to C3 setting. This larger box makes it faster to react to the ducks as they surface.
C3 and C4 target areas are also useful when you start to recognize that a bird is about to take off, reference last month blog post.
Practice at home:
Work to adjust the target area while keeping your eye on the viewfinder. This will allow you to work quicker in the field and not waste time needing to adjust and then relocate the subject in the viewfinder. As you become more efficient in the field, your success rate will increase and this can start with practice at home.
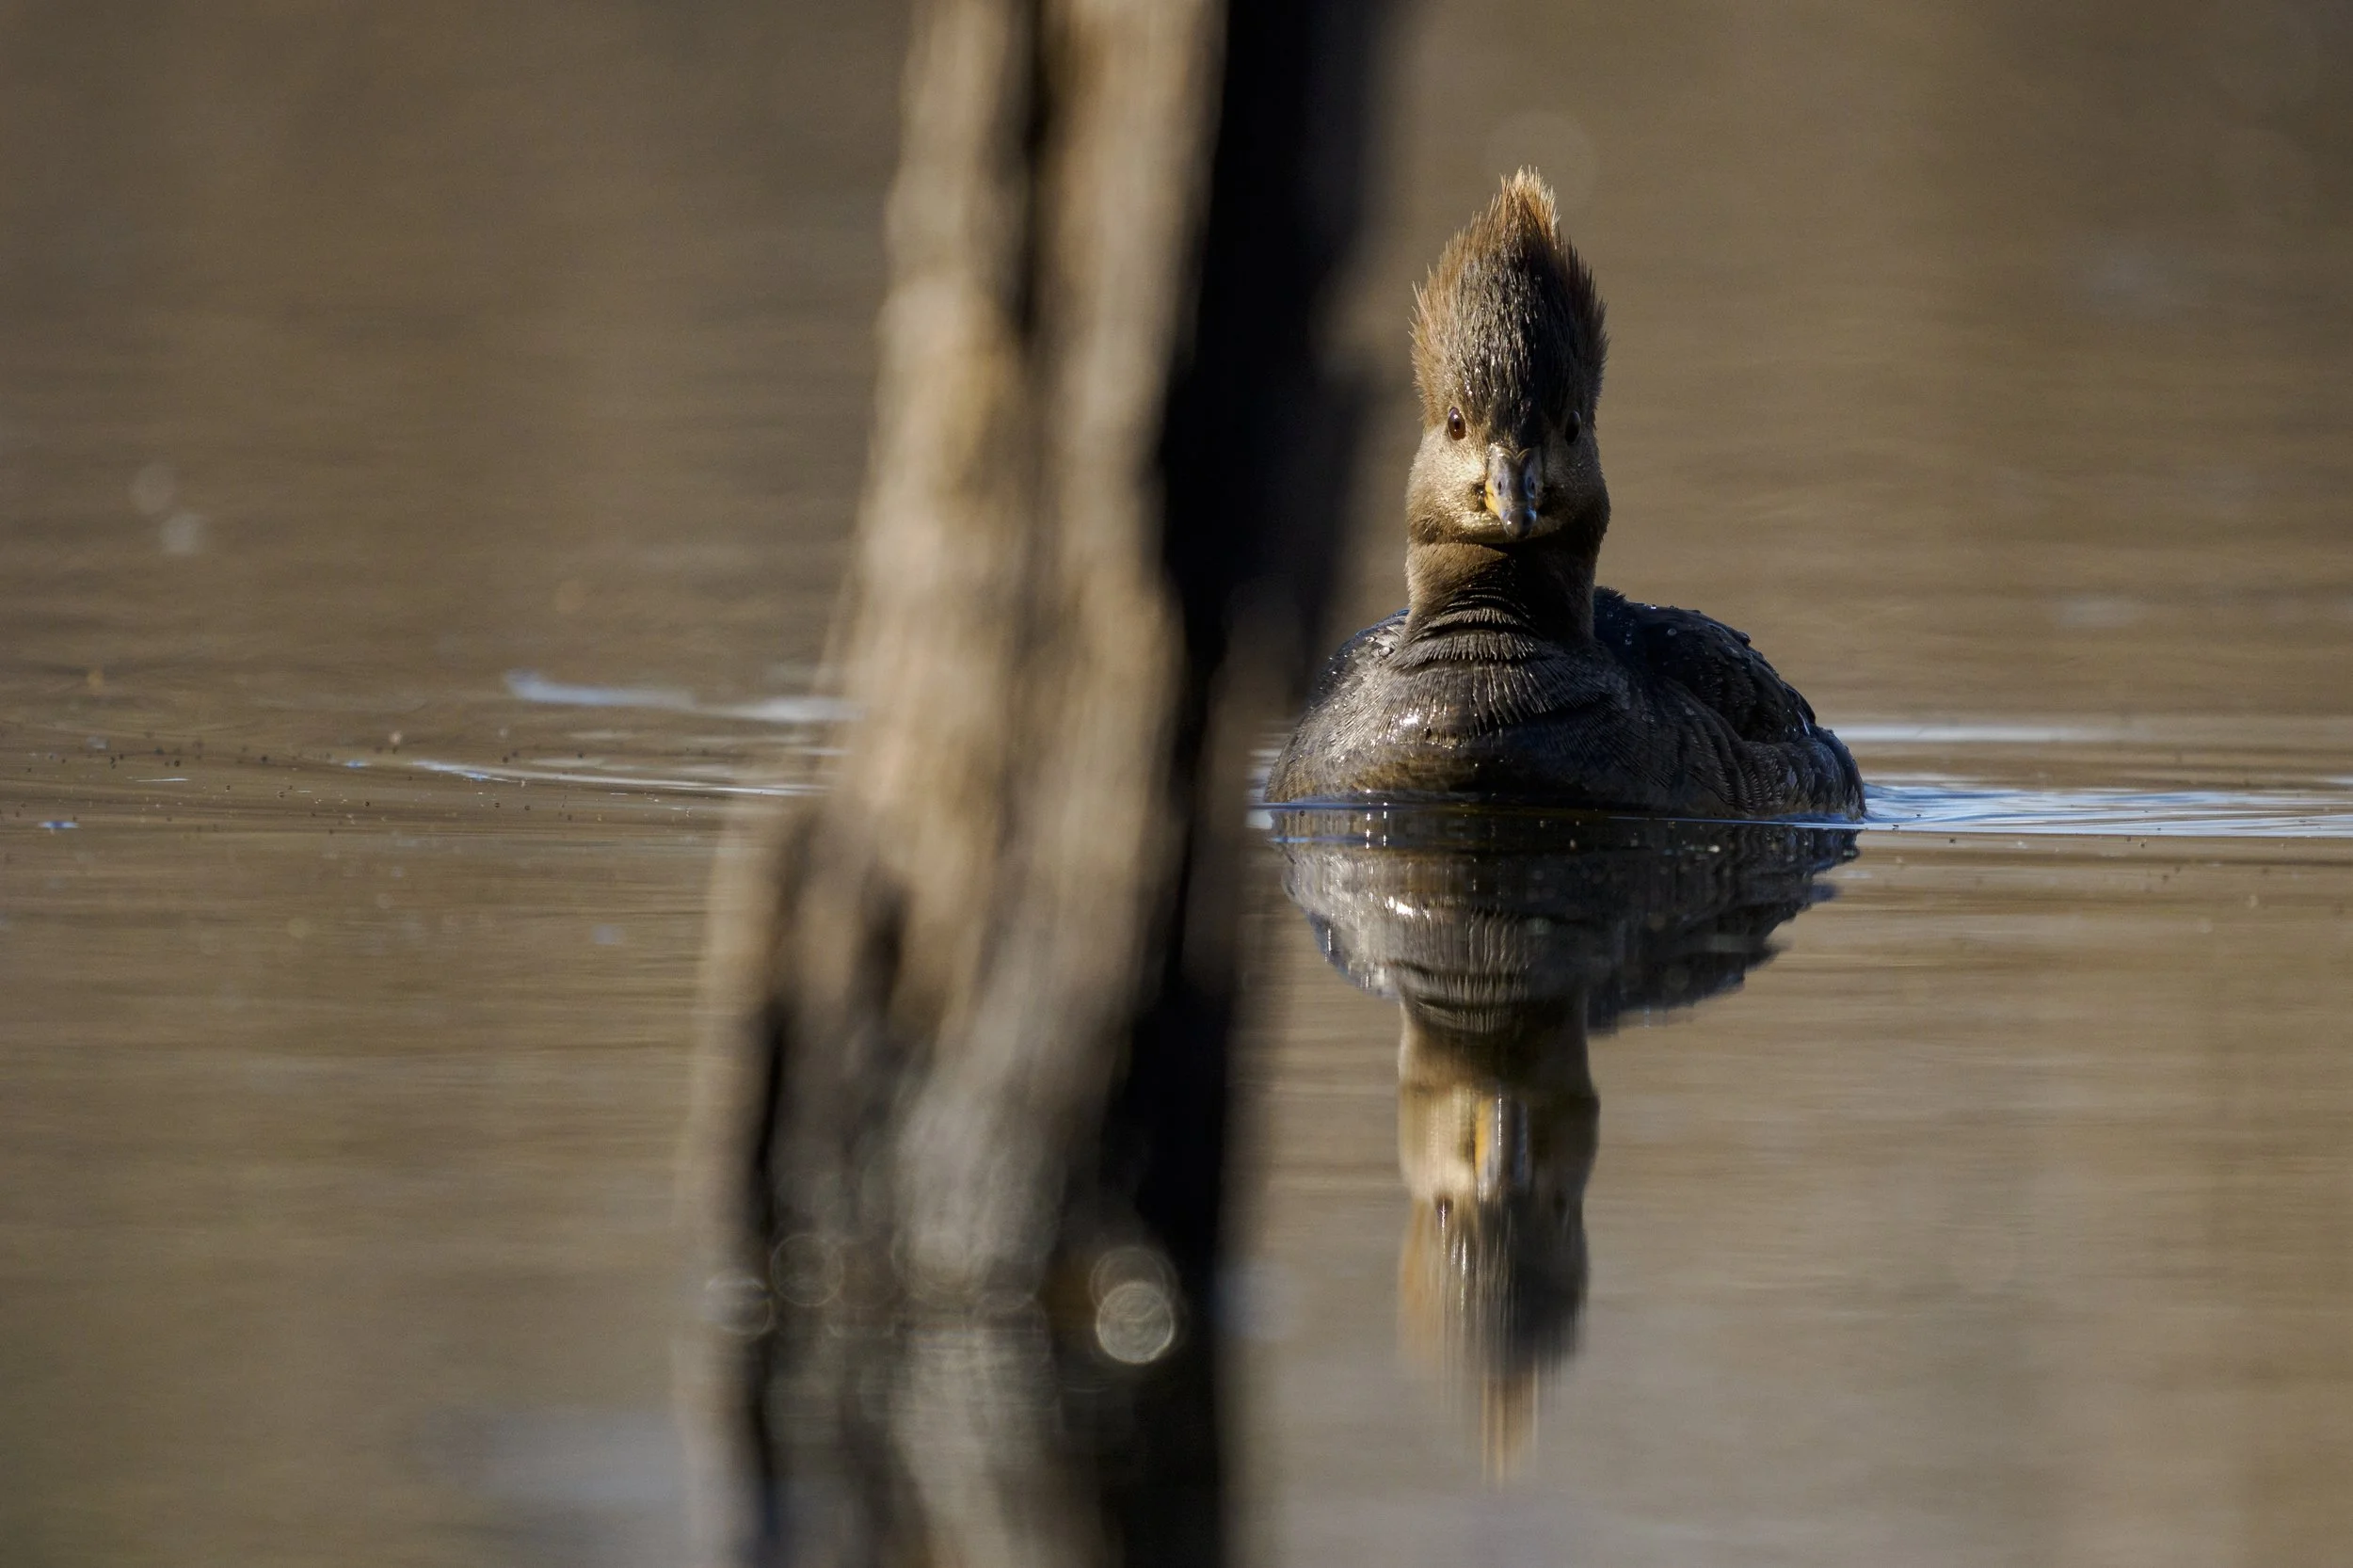
OM-1 Mark II 500mm f/5.6 1/1250 ISO 800
This female hooded merganser was moving right towards me, however this log was directly between me and her. I adjusted my target area to the C1 so I could ensure focus landed on her head, rather than the log between us.
When Is Tracking Working Against You?
The tracking and subject detection of the OM-1 Mark II is very advanced and often does a fantastic job of recognizing and locking onto the subjects. There are a few times when tracking actually works against you however.
If the subjects are far away, the camera will have a harder time getting consistent focus on the subjects, especially if there are some contrasty ripples along the surface of the water.
Tracking may also jump focus when you are photographing waterfowl that are close to vegetation. This is especially true in spring time when many plants are emerging from the surface of the water. Turning off tracking and using a smaller target area, can help you pinpoint focus and help you get more consistent results.
Notes from the Field:
While laying on the banks of the wetlands a pair of American Black Ducks (Anas rubripes) started to make their way towards me. I dialed in my settings and set my autofocus to the C1 setting. I noticed that along the surface of the water there were sticks and branches poking out, so I wanted to be able to pinpoint focus on the head of the duck.
I saw where the duck was likely to head, so I prefocused on one of the sticks near where I anticipated the duck would emerge. I positioned my target area box in the right third of the viewfinder and waited.
Once the duck paddled out in a clearing between the sticks, I pressed the AF-ON to engage focus and was able to get this shot.
By using the small target area, I was not worried about the camera being confused by the small sticks around the duck, and tracking locked right onto the head of the bird.
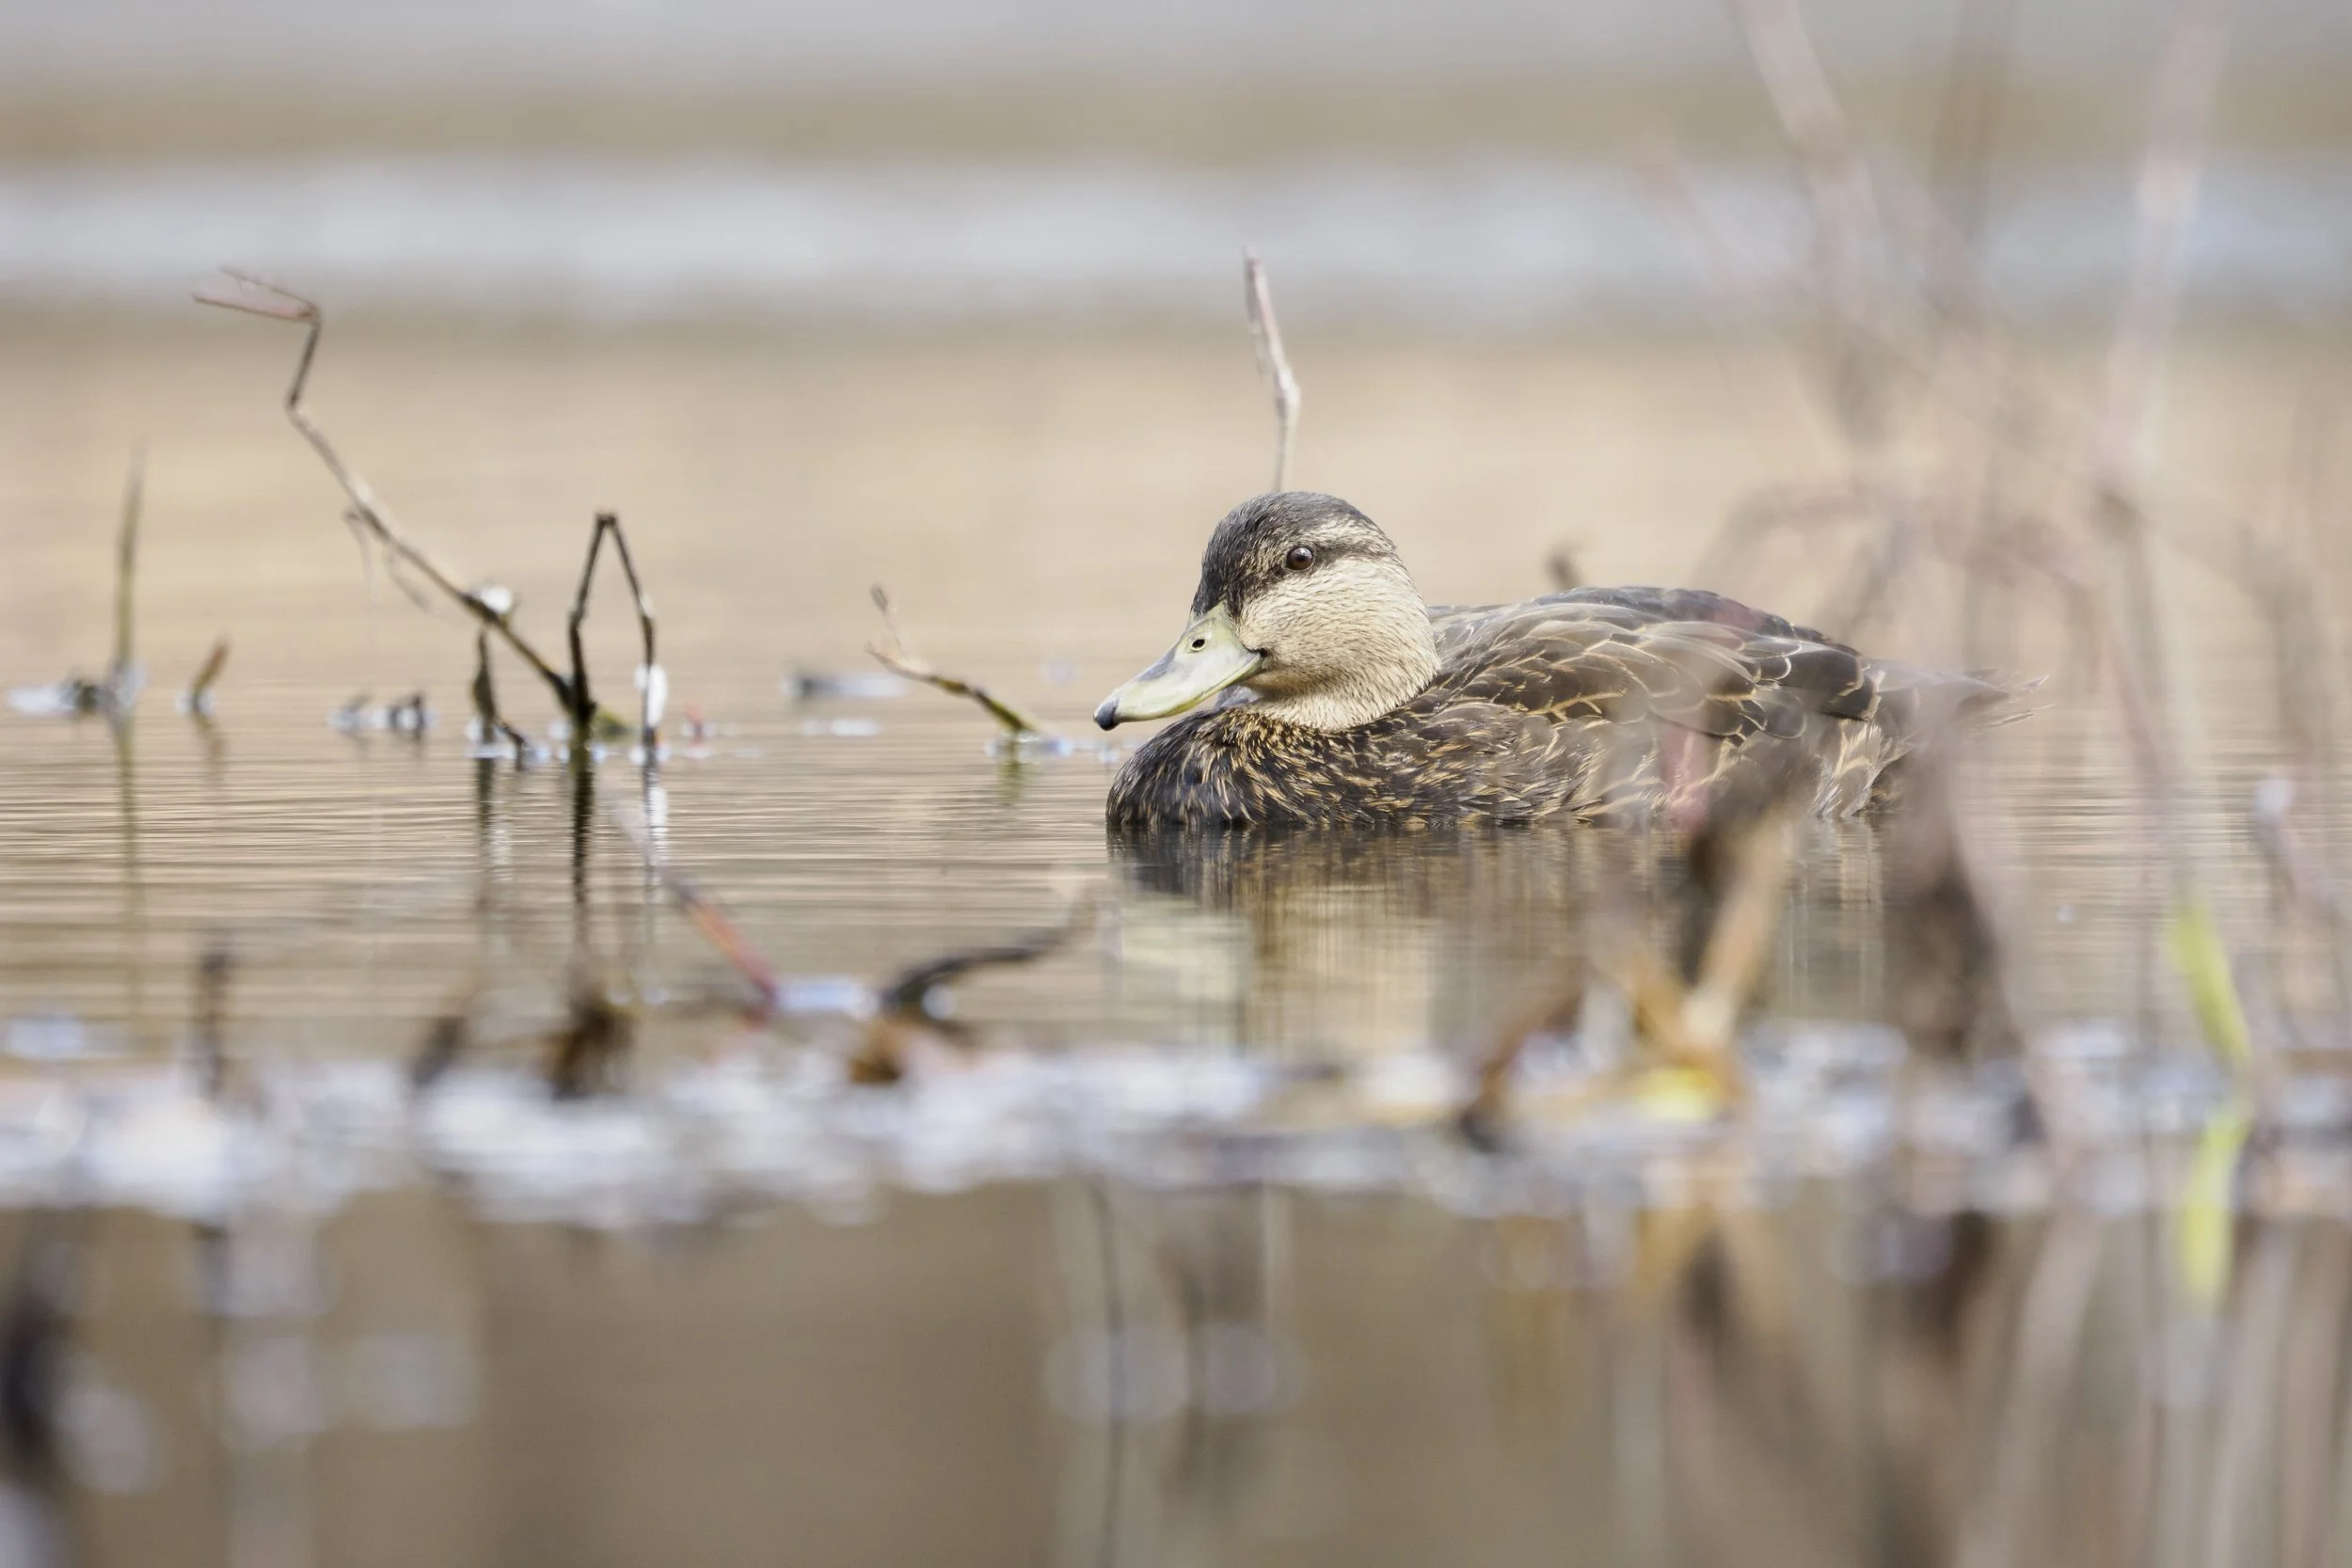
OM-1 Mark II 400mm f/6.3 1/250 ISO 500
Matching Settings to Behavior
There are a few things to consider when your subject begins to move.
As movement increases, a larger target area will help you stay focused on your subject.
For stationary subjects, a smaller target area will help you pinpoint focus with higher consistency.
As the subjects get closer to you, adjust to a larger target area, so you do not need to be as deliberate with aligning your target area with the subject.
Also, typically as the subject is larger in frame, tracking will have a much easier and consistent time following the subject. Linking tracking to the subject versus the target area will also allow you to quickly recompose without needing to adjust the location of the target area.
For birds in flight, use a larger target area to let the camera more easily focus on the bird. For smaller birds in flight, I will typically use the ALL area mode and let the camera find and focus on the subjects.
Common Mistakes
The most common mistake I see from clients is using too large of an autofocus area for the subject and situation they are trying to photograph. This tied with being reliant on subject detection can result in inconsistency with focusing.
Another common struggle is moving the target area around efficiently in the field. It pays off to practice moving around the position of the target area in the viewfinder so you can follow the subject and adjust your composition accordingly. Always keeping the target area in the center, and then trying to recompose from there can result in some missed opportunities when subjects are moving.
These techniques can be used no matter what subjects you are photographing, and once you master your autofocus system, you can then really start to work on composition and more advanced techniques.
Like everything with photography, there is no substitute for time in the field to practice these techniques. The more you practice, these adjustments will become second nature.
If you’re looking to improve your wildlife photography or get more out of your OM System gear, I also offer one-on-one wildlife photography mentorship sessions where we can go deeper into topics like field technique, autofocus setup, and wildlife behavior.